How to Upload Your Video to Youtube From Final Cut Pro
In this tutorial, yous'll learn the proper methods of how to export in Last Cut Pro X. Exporting is a simple process of figuring out which resolutions and file sizes will exist right for yous and your final video. Depending on where you intend to host your video, or how much time you lot're looking to spend rendering, there volition be a diversity of options available.
One familiar result that editors face fairly often is rendering out a clear video in 1080p, then uploading the video and seeing that the video has had its quality degraded by the video hosting platform. By learning how to export in Final Cut Pro, you'll be able to avoid this issue and cheating yourself out of loftier resolutions, clear frame rates, and strong overall visual quality. Let'southward dive in!
Part 1: How to Export in FCPX
Agreement the variety of destinations for your export volition help craft the necessary quality for your video.
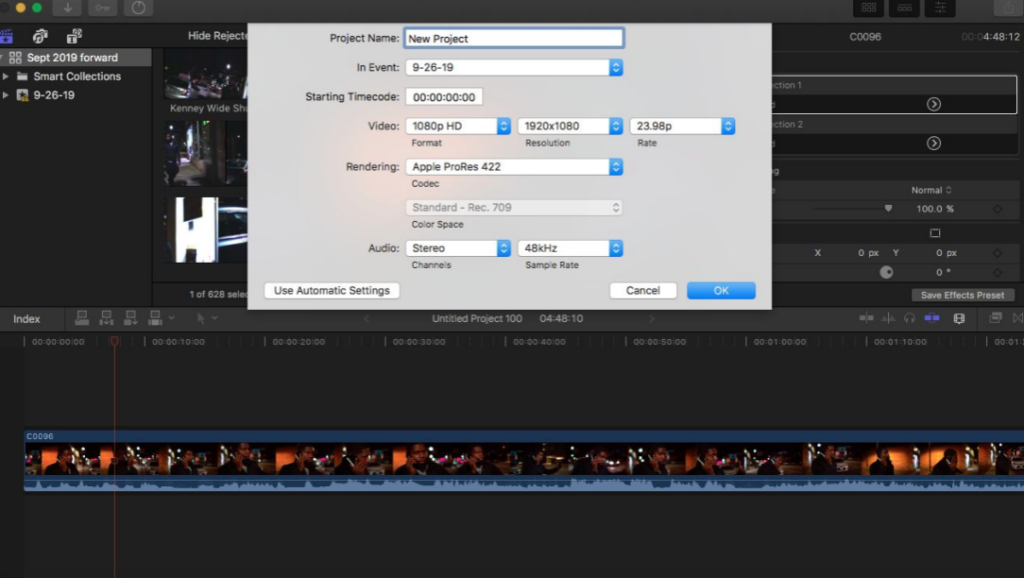
Step 1: Cull a Projection to Export
Before starting your export, select the proper video project.
- Open up upwards your project library view with the shortcut Control + 0.
- Select the project from your library you'd like to export or create a new one by selecting Command + N.
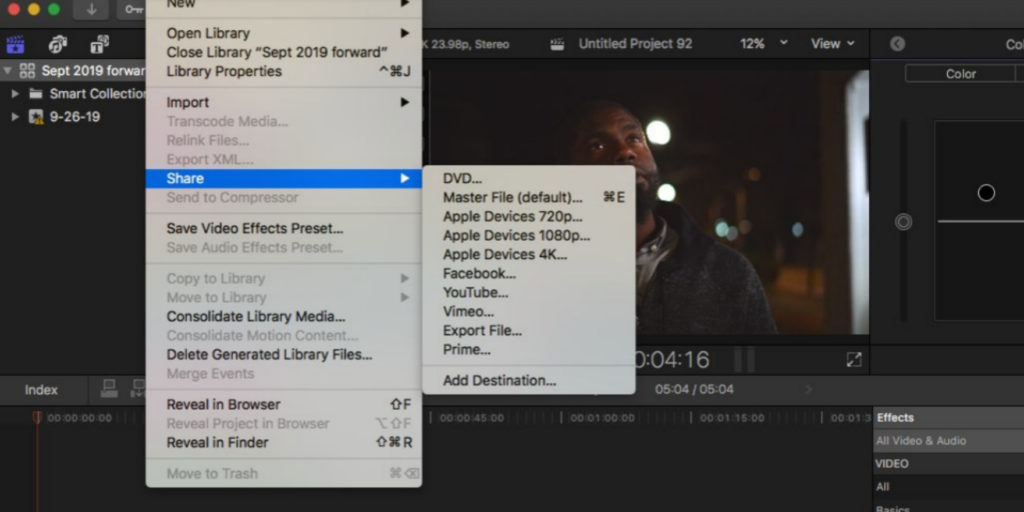
Step 2: Choose the All-time Export Settings
- Finalize your timeline and select the File tab.
- From there, select Share or Control + E.
- You lot'll likely want to export using the Master File pick as your default choice. In case that doesn't whet your appetite, nosotros accept some alternatives below if you'd similar to get extra specific or just apparently adventurous! You'll observe a diversity of options in the explanations and tables ahead.
- Past selecting the Master File tab, the Settings panel will appear.
Recommended Resolutions
Depending on the dimensions of your video file and where you intend to upload information technology, you'll want to select the resolution that will brand information technology piece of work best. Afterward opening Last Cut Pro, y'all'll exist able to cull a project resolution that matches your footage.
Here are the standard recommended resolutions for social media and video hosting platforms:
| Format | Recommended Resolution |
| Standard Video | 1920 x 1080 |
| YouTube | 1920 x 1080 [or 4096 x 2304] |
| Vimeo | 1920 x 1080 [or 4096 10 2304] |
| 1920 x 1080 | |
| 1080 x 1080 [or 640 x 640] |
Recommended Codecs

Codecs assistance tell your machine how to return the video. Their value is 1 that is oft underrated and often disregarded. Just which codec you decide tin can make a globe of a difference!
Codecs are well-nigh as important to the exported video file equally the resolution. The standard codec for videos to be uploaded online is H.264. H.264 offers a compressed file with minimal loss in playback quality. That'southward correct, you lot can relish a nice balance of a high-quality video with a smaller file size. Pretty sweet!
Nonetheless, if your video is hinging on that teensy extra chip of visual clarity, or if the subjects of said-video are lit poorly, the Source – Apple ProRes 422 codec is about recommended.
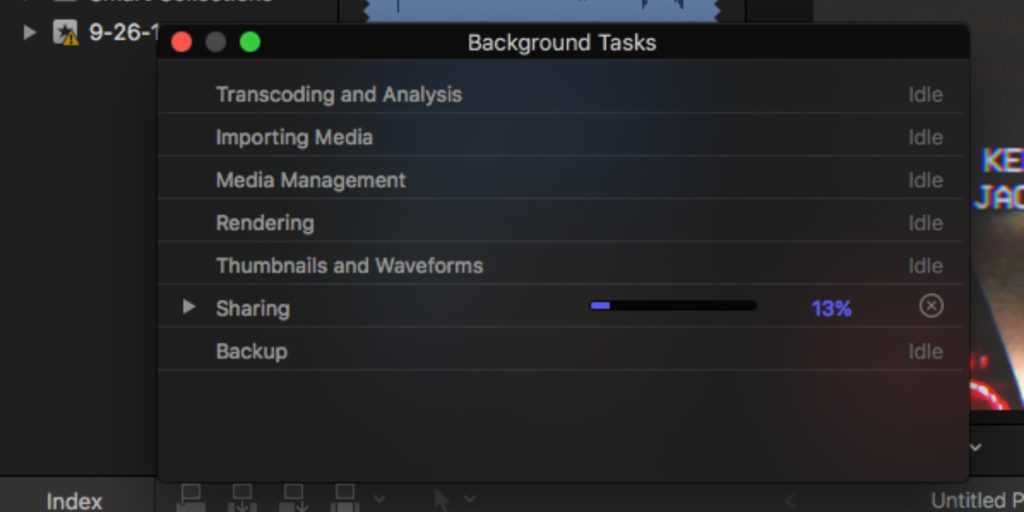
Step 3: Monitor Your Export Progress
You lot can monitor your progress easily! By simply clicking Command + 9, you will be able to see how far along the exporting process has moved. Final Cut Pro will requite you an exact percentage to run into how close to completed your video is.
Office 2: Pro Tips & Troubleshooting
one. Exporting a Section of Your Timeline
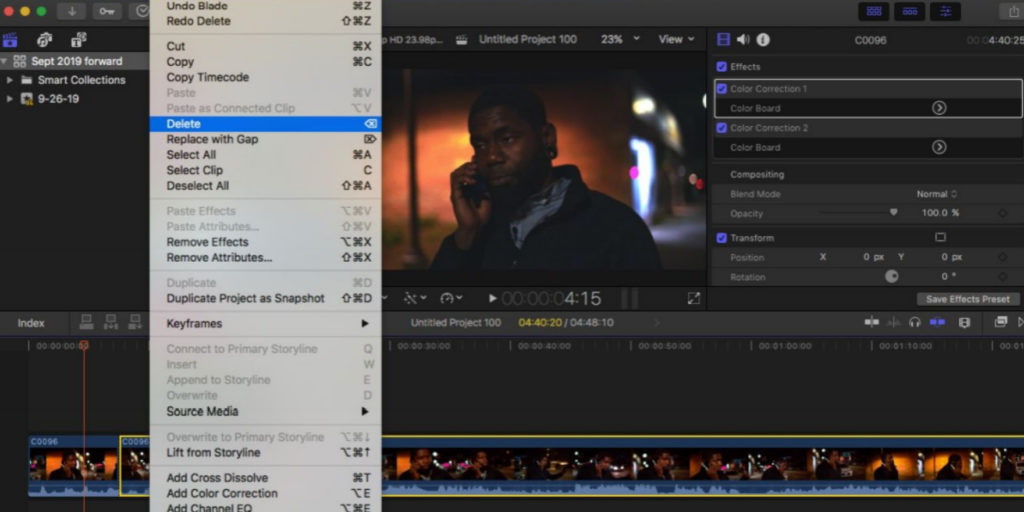
Sometimes you don't have the time to return out an entire project and need to preview just a portion of it. Luckily there is a uncomplicated solution for that. If in that location is a specific function of your projection you'd like to render out individually, you'll be able to do that by following these steps.
- Blade the sections of the clip you want to return. Utilize the shortcut Control + B.
- Highlight the rest of the project and Delete by using the backspace or delete key. (Y'all volition exist able to restore information technology afterwards the render).
- Follow the Export settings to a higher place to render the individual clip out.
- After the prune has been rendered, utilise the shortcut Control + Z to restore the deleted project files.
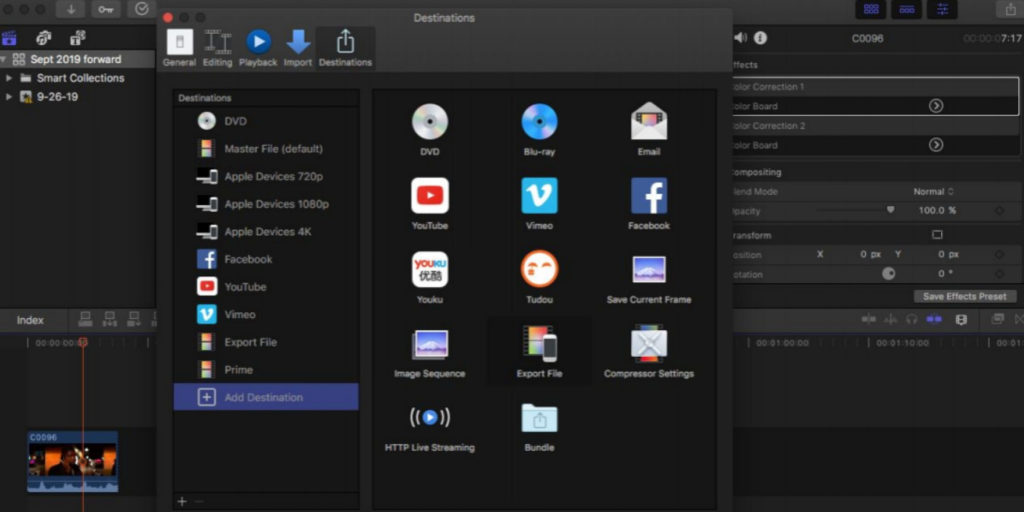
2. Save Export Settings
If a particular setting works for your video, it's recommended that yous keep that preset saved for convenience. Presets can be applied to maintain consistency. Under the File and subsequent Share tabs, you will find the Add Destination option.
- Construct your output preset by selecting the Add together Destination tab in the File menu.
- Add Destination will present several options.
- While you lot can consign direct to YouTube, Vimeo, and Facebook, the safest option for your export is to select the Export File.
- You volition be able to salve this method by double-clicking it while the menu is open.
- Name the Consign method to differentiate it from the others.
iii. Cut Downwards on Slow Consign Times
Render times can be a hassle, particularly for longer projects. Below you'll be given options for cutting dorsum on the wait time that comes with exporting video from Final Cut Pro.
Resizing Dimensions
The larger the dimensions of your video, the longer you'll probable accept to await for the output file to return. If you lot are willing to compromise visual quality with a lesser await time as the video builds itself in Final Cut Pro, you lot may want to consider settling for a lower resolution video.
- If your video is 4K, you lot may desire to consider exporting video from Last Cutting Pro with a 1920 x 1080 output.
- If your video is 1080p, you may want to consider exporting video from Final Cutting Pro with a 1280 10 720 output.
Checking the Progress of Your Render
- To monitor the progression of your render, simply select Command + 9.
- The Groundwork Tasks toolbar will appear and prove the percentage of your video completed.
Things to Finish Before Exporting
- It's recommended that all plugins used with clips in Terminal Cut Pro exist rendered out respectively in their own project files to avoid slowing of the process.
- In-software functions such as Stabilization, Ken Burns outcome cropping, and audio denoising are to be washed before rendering an output file.
Final Cut Pro is one of the more user-friendly editing softwares bachelor. Although some of its functions may seem a scrap confusing at first, they can be quite simple to chief. Nosotros hope this tutorial has helped you learn how to export video from Final Cutting Pro with ease! You'll be able to offer yourself a variety of video outputs to meet your needs equally both a video editor and someone operating on a deadline.
grimwadeagetwoubding.blogspot.com
Source: https://motionarray.com/learn/final-cut-pro/how-to-export-final-cut-pro/